
How to Use UserTesting in Your In-Person Research


In a previous post on the UserTesting blog, I wrote about my love for usability labs and in-person research. Meeting with users face-to-face allows a researcher to have an open conversation about a current site issue or a potential design flaw. This is especially useful when gathering ideas for a redesign. Asking follow-up questions lets a researcher discover why a problem exists, and speaking face-to-face allows a researcher to take the time to identify whether any of the proposed solutions will make a problem go away.
As I became more familiar with UserTesting and the value of remote research, I also started to wonder if and how UserTesting could gather data from an in-person study in a usability lab.
But why use a remote testing tool in the lab?
If UserTesting is for gathering remote feedback, what would be the benefit of using it during a lab session?
Put simply, UserTesting can ensure that all of your research efforts are stored in the same place. Videos from your lab sessions and your remote sessions can coexist in the same cloud, under the same login, using the same interface. If you want to access data from a prior study, it can be found near data from your current study. Study labels, folders, tags, and notes, are all built-in UserTesting features that are designed to help find that data quickly and share it quickly with colleagues.
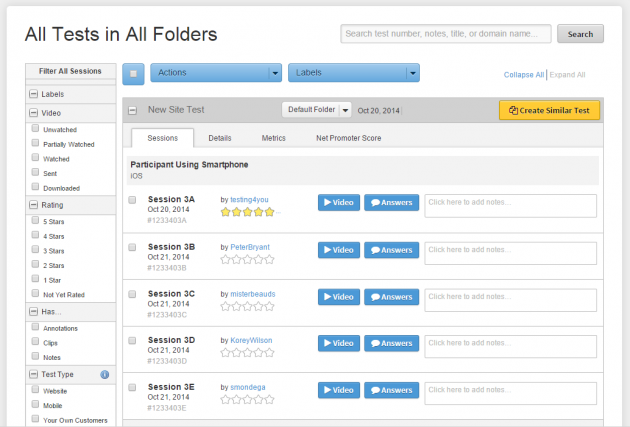
It's easy to organize and view all of your tests in one place in the UserTesting dashboard.
Live it, learn it, clip it
One of the biggest challenges of in-person usability testing is jotting down clean and accurate notes before thoughts and quotes escape. A video of your session lets you review and double-check those moments. With your lab session videos in your UserTesting dashboard, the tool's Clip and Annotate features can help you analyze the recordings.
An added bonus is that each video uploads to the dashboard immediately after the session is completed. There is no bulk transfer process that would come with lifting the lab session recording from an electronic device or other piece of recording software.
Recruit local
Depending on how far along a project is, there are times when a researcher may want to talk to someone close by, and also may not have the luxury of working with a fleshed out comp or prototype.
I’ve been in countless situations where I wanted to see how a user adapts to an idea, but I didn’t have time to set that idea up in an online environment. In these situations, feedback is still necessary and helpful, and I would still want a recording of the interaction to help in deciding the direction of the product.
With a UserTesting account, you can get help recruiting local panelists to come into the lab in your office. With our large and diverse panel, it's easy to find users who are available in your area. As part of a UX team that works together to meet deadlines, I can attest that it never hurts to have another source of fresh opinions.
How to get started with UserTesting in the lab
Okay, so how does this work? As you probably already know, to run and analyze an in-person usability study, you need the following things:
- A product, prototype, website, or design
- A user
- A quiet environment
- A computer or mobile device
- A microphone
- A solid test plan
The only other thing you'll need to run an in-person study with UserTesting is a UserTesting pro account. (This feature is available on certain subscription plans.) Any time you set up a remote study in the UserTesting dashboard, you choose your target audience and write out the tasks that you want to watch users complete. When running a study in a usability lab, we’re still going to do those things, but we’ll add a twist.
Select the "Recruit Your Own" tab in the dashboard
When creating a study with UserTesting, the first step after opting to either test a website or test an app is to choose your target audience. In most remote usability cases, you would want to find users in the UserTesting panel. (Our panel is very large, so it's easy to find any test participants you need at any time of day.)
For in-person studies in a usability lab, however, you'll select the tab that says “Recruit Your Own.” You will also choose "No" when asked if you would like for the test to be moderated. By clicking this tab, you'll get a web link that allows you to start a study session on demand, rather than releasing the study out to the UserTesting panel.
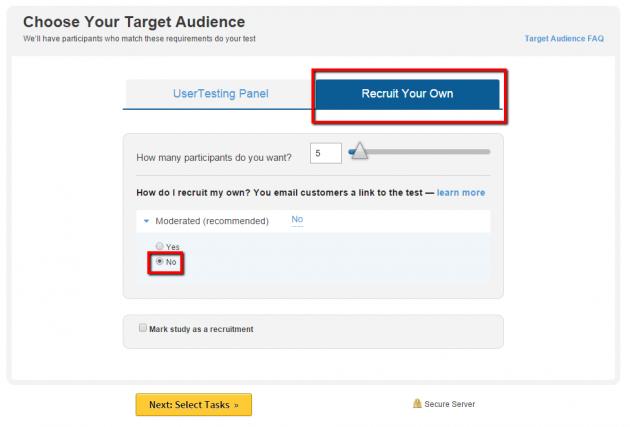
Selecting the Recruit Your Own Audience tab allows you to give users a link to the test.
Build the study
In your dashboard, build your test plan by writing, dragging, and dropping tasks and questions. Once you launch your study, you’ll receive an email with that web link that we mentioned earlier. You’ll want to hold on to the link for later. When you've launched the study, you’ll see the number of sessions in your study set aside on your UserTesting dashboard.
Paste the link
Okay, the first user is about to arrive for the big usability lab study. The product, prototype, website, or design is set up on a computer or mobile device in a quiet environment. The microphone is plugged in. A solid UserTesting test plan has been built and launched.
Now it’s time to grab that web link. After meeting and greeting the user when they arrive, ask them to follow the web link. The user will be prompted to enter an email address, and the screen recorder will be ready to begin.
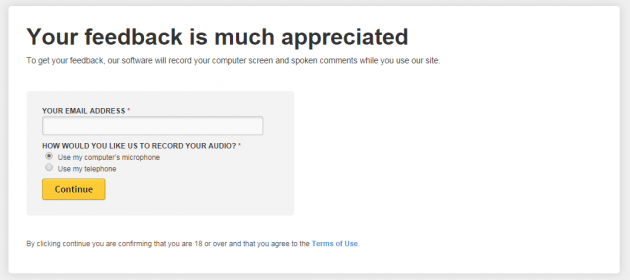
Test participants will see this screen once they click on the custom link.
Once the screen recorder starts, the lab study is underway! The tasks from your test plan will display on the screen for users to read. If you have a researcher sitting next to the participant to facilitate the test, just make sure they are close enough to the microphone to be heard on the recording.
After the session
Once a session is finished, it uploads to your dashboard. From there, you can analyze and annotate it, and make insightful highlight reels and clips, just like any remote UserTesting session. Metrics and time-on-task can also be incorporated.
The session is stored safely on the cloud, organized alongside other potential components of a research project, and can be referenced for any presentation or data request.
We're happy to help
As always, practice makes perfect. Make sure to do a dry-run of the study, just to make sure there are no unforeseen problems. If you have any questions during setup, contact your UserTesting Client Success Manager.
And if you don't have a UserTesting account yet, you can get a free trial of a Pro account here.
Happy testing!
In this Article
About the author(s)
Get the latest news on events, research, and product launches
© UserTesting 2024