8 steps to building features your users actually want

Today's guest post was written by Craig Morrison, founder of UsabilityHour.com. Enjoy!
You shall not pass
That’s a quote from Lord of the Rings, in case you’ve lived under a rock for the last…60 years. This is the quote that echoes through my head every time someone suggests a new product feature.
I would like to scream it out loud, directly at that little post-it note with the feature written on it, but, you know, that would be crazy.
Features are a doubled-edged sword. Releasing a great one could be the defining moment that takes your product to the next level.
Explosive growth, overjoyed users, and investor money raining down from the sky.
But more often than not, that new feature just ends up as another item in your ever-expanding navigation bar. One that’s distracting your users away from the main reason they're there.
As the list of features you add to your product grows, so does their impact on your UX, your budget, and your team's effectiveness.
You must be certain that new features will help your product more than they hurt it.
For example, if you promise your users a faster way to manage their Twitter feed and decide to add Facebook support, you’ve changed the product's value proposition.
Your users signed up for a tool focused solely on Twitter, and suddenly, they’re finding features for Facebook mixed in. This can lead to confusion and frustration when users have problems locating the actual features they signed up for.
Going a step further, these new Facebook features now need your team's attention. Bugs need to be fixed, support cases need to be dealt with, and functionality needs to improve.
This means you’re spending money, and your team’s time, on this additional Facebook support.
But what if no one even wanted it?
What if Facebook support is getting in your users' way, costing you money, and taking focus away from improving the Twitter functionality?

“Frank’s wife told him to stop bringing his work home with him, but he was all out of whiteboard space.”
This is why feature requests must go through a strict process that ensures they help your product more than they hurt it.
I’ve seen firsthand what the impact of a runaway train of feature development looks like. (Hint: it looks like an empty bank account.)
So I’ve put together 8 detailed steps for you to follow to ensure that each feature request meets the following criteria:
- It solves a problem your users actually have
- It’s usable
- It isn’t creating clutter
Note: Strapped for time? I’ve put together a free checklist that summarizes “8 Steps to Building Features Users Want” to save you time, and give you something to refer back to later on easily. You can download it at the end of this article.
These 8 steps are entirely based on Ash Maruya’s feature-building methodology from Running Lean.
1. Set your default response to “No”
As your product grows and you start to attract more users, the floodgates open up on feature requests.
They will come from everywhere. Your users, your team, and especially your own brain.
Why? Because thinking up features is awesome. It’s the fun part. You get to visualize how users will benefit, and how it will be a game changer.
The problem is that everyone’s idea for a new feature is a game-changer. It’s not even possible to change the game that many times.
It’s important to set your default response to no.
I like to think of feature requests as worthless until proven valuable. The moment they are born, they are put on trial for the attempted murder of your product.
Think of feature requests as worthless until proven valuable.
What follows is a series of trials which attempt to prove them valuable. Fail to prove its value, and it pays the ultimate price.
Adopting a mindset that new features are bad will limit your excitement and enthusiasm, preventing you from charging forward and implementing them without the proper research and validation.
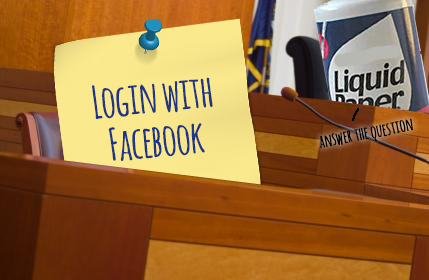
"Mr. Post-it. Did you, or did you not, overstate your product value?"
2. Identify the problem the feature solves
I love this step because it is a “kill step,” meaning that if the demand for the feature can’t be proven, this is the first point at which we can remove it from the list.
To be valuable to your users, the new feature needs to solve a problem for them.
If it doesn’t, they won’t use it, and then it becomes clutter. Clutter takes away from their experience with your product. Clutter = bad.
A new feature needs to solve a problem that's actually worth solving.
This first step might be the easiest, yet most important. It’s as simple as talking about it and trying to justify why it should be included.
Find the source of the feature request. Was it a user? Was it a team member? Either way, sit down with the user or your entire team and discuss the reasons for building it.
In Running Lean, Ash Maruya suggests, “Try to talk the customer out of wanting the feature. Have them sell you on why it should be added.”
Determine if this problem is actually worth solving for your users. If it isn’t, kill the feature. If it is, move it along to the next step.
3. Define how you will measure success
Many things can go wrong when releasing a feature if you haven’t decided upfront what the measurement of success of that feature is.
It’s great if the feature solves a problem that your users have, but you need to go one step further. You need to decide how you will measure success regarding product metrics.
Before releasing the feature, you should set a hard goal. If the feature fails to meet that goal, then you know it’s a failure. At least, in terms of what you expected it to accomplish.
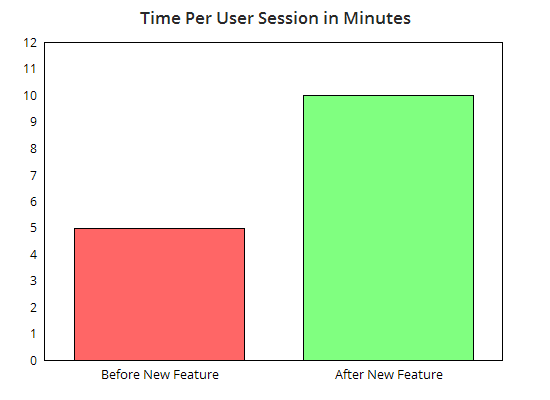
For example, let’s say you’ve decided to add Facebook support to your Twitter management app. The problem this is solving is that users don’t want to switch apps when managing each of their social profiles.
The predicted measurement of success could be that adding Facebook support will increase users’ session times by 50%.
Setting a benchmark like this is a good way to gauge the feature's impact once it’s released, so it’s important to put this goal at the beginning.
4. Mockup the front end
This step aims to create something tangible that a user can interact with and that can also be easily changed without much effort.
Start with a sketch, a wireframe or a pre-existing layout, just don’t create any backend functionality yet.
The goal is to create something that provides the user with a visual, tangible solution that lets them determine if it would actually solve anything for them.
Because there’s a very good chance you’ll get it wrong on the first attempt, putting only the minimal amount of effort into this step is vital.
Once you’re happy with your layout, build it in HTML/CSS, or some kind of system that is easy to adapt to user feedback.
Keep in mind that this isn’t an excuse to put together something quick and dirty. It needs to look as real as possible to get the right kind of feedback from your users.
5. Collect user feedback and refine
It’s not enough to just throw this feature at live users and ask them to play around with it. You need to set the stage properly.
The test participants need to understand two things:
- What your product is, and why do people use it
- The problem that this feature is solving
Chances are you’ll be testing on your own users, so they’ll understand the context of your product.
But if you’re using a service like UserTesting, it’s important to explain to the test participants up front exactly what your product does and the reason people are using it.
These test participants also need to understand the problem you’re solving. The best way to approach this is by telling them a simple user story leading up to the problem.
It doesn’t need to be super complicated, but it should allow them to experience the problem firsthand. This will make their feedback much more genuine and valuable.
I’m not going to go into the specifics of user testing. But the overall steps here are as follows:
- Allow the user to experience the problem firsthand (user story)
- Present your solution (feature) to them
- Collect feedback
If the overwhelming response is positive, you should move on. If it’s not, you must consider everything you’ve learned, iterate your solution, and test again.
Repeat this process until you’re confident with the results, then build the functionality behind it and make it work within your product.
6. Release partially and collect qualitative feedback
At this point, you’re happy with the way the feature works. You’ve demoed it for many of your users, considered their feedback, and refined it.
Great. Should you just release it and see what happens? No. Instead, release it to just a small portion of your users. This is called a partial rollout.
Choose a few customers to release the feature out to. Let some time pass, and then approach them for a formal interview and user testing session.
How is this different from the last round of testing? Because now the feature is in the real world. Your users are interacting with it (hopefully) while actually engaging with your product, not just seeing it for the first time in a user test.
While the last round of user testing was about showing them a problem and asking their feedback on your proposed solution, this round will be more a open user test.
Watch the user interact with your product freely. When they land on your new feature, ask them questions about it. Give them tasks which lead them to the original problem and see if they take advantage of the new feature to solve it.
Refine the feature with what you’ve learned from your users as you see appropriate.
7. Release fully and collect quantitative results
You’re happy, and the small portion of users you’ve released to are happy. It’s time for a full-blown release.
Set the feature free and roll it out fully across your entire product. While you're at it, send out an email blast or write a blog post up explaining the new feature.
If all goes well, this could be the game changer you’re looking for.
You’re finished right? You’ve gone through the painstaking process of refining this thing 100 times until everyone is happy. It’s finally over.
No. This feature is still on trial. It's worthless until proven valuable, remember?
Let the feature run for a week or two, whatever your product needs, to get a significant amount of interaction between your users and the feature.
At this point, we just want to sit back and let your users interact with it organically.
Just make sure your product is collecting metrics! Without them, there’s not even going to be a way to tell if this feature is good or bad, so be sure you have a system in place.
8. Compare results and decide if it stays
The moment has arrived. Your new feature has been live for a while now. It’s time to make a decision. Does it stay, or does it go?
To start, compare the metrics from the week/month before and after you released. Note the impact it had on your product. What improved? Did you get an increase in users? Higher activation rates?
Most importantly, did it match the measurement of success you defined in step 2?
This is subjective to your product, so I can’t give you a number like “kill the product if only 1% of people are using it”. This decision needs to come from you.
If a feature isn't succeeding, it's hurting your UX, budget, and focus.
Maybe the new feature didn’t meet your success goal, but it did bring increase your signup and activation rates. That’s still a pretty good reason to keep it around.
But if you can’t find any improvements in your metrics, it’s vital that you remove that feature. If it isn’t doing any good, it’s only hurting your user experience, your budget, and your team’s focus.
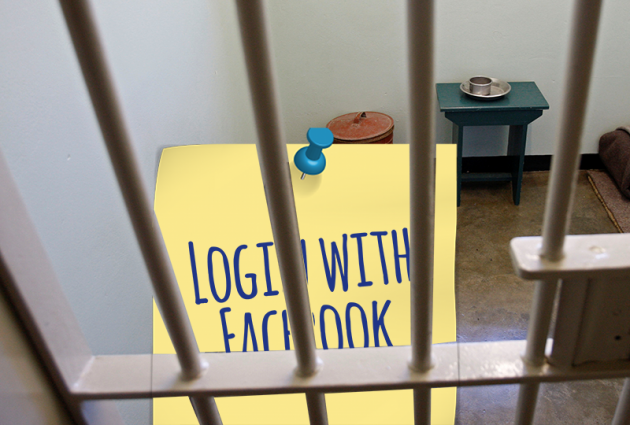
“You can’t do this to me. There are guys from Friendster and MySpace in here!”
Let’s summarize
In my experience, feature bloat is the most threatening factor in product success. It affects your UX, dilutes your team's focus, and shortens your runway by seriously draining your budget.
Those are the 8 steps you need to follow to be sure the features you are adding are helping your product more than they are hurting it.
Let’s do a quick review of the steps:
- Start with no
- Identify the problem
- Define success
- Mockup the front end
- User test and refine
- Release partially and refine
- Release fully
- Compare metrics and decide it’s fate
That’s a lot to take in all at once.
To make it easier for you, I’ve compiled a summarized checklist of all 8 these steps, so you can just refer back to it as you go through the process.